Showing posts with label bake. Show all posts

Friday, March 18, 2016

Food Friday: Butternut Squash Crockpot Soup & Easy, Homemade Bread

Butternut Squash Crockpot Soup & Easy, Homemade Bread - TheCraftyMann.Blogspot.Ca

Last week there was a very rainy, cold day, so I knew I had to make something warm. Nic had brought home a butternut squash, and I found a super easy crockpot recipe, so that was an easy decision-crockpots make things very convenient. I also hadn't baked any bread since moving to Toronto, so I figured that was the day! The recipe I used makes one loaf pan, perfect for the two of us. 

Butternut Squash Crockpot Soup & Easy, Homemade Bread - TheCraftyMann.Blogspot.Ca

Ingredients for the bread:
3/4 cup warm water (you don't want to kill the yeast if it's too hot)
1 package dry yeast (2 1/4 teaspoons)
1 teaspoon salt
1 1/2 tablespoon sugar
1 tablespoon vegetable shortening
1/2 cup milk
About 3 cups flour

Step 1:
In a bowl of warm water, dissolve the yeast. If it starts to get gloopy, it's working!

Butternut Squash Crockpot Soup & Easy, Homemade Bread - TheCraftyMann.Blogspot.Ca

Step 2:
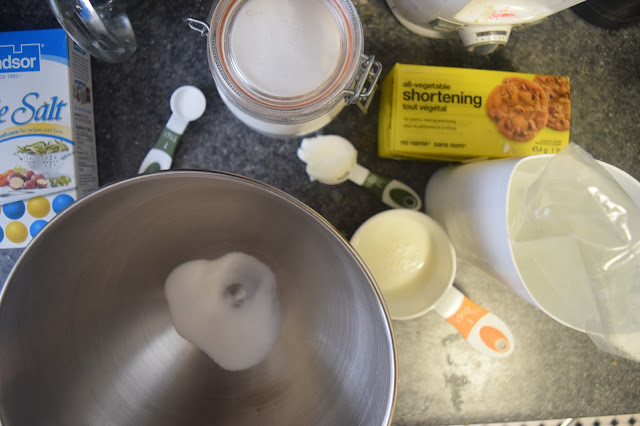
In a large bowl, combine salt, sugar, shortening, and milk.

Butternut Squash Crockpot Soup & Easy, Homemade Bread - TheCraftyMann.Blogspot.Ca

Step 3:
Slowly combine 2 cups of flour into the bowl of dried goods.

Butternut Squash Crockpot Soup & Easy, Homemade Bread - TheCraftyMann.Blogspot.Ca

Step 4:
On a floured surface (or in your stand mixer) knead the dough until it is soft, not sticky.
Getting the right texture for the dough can be challenging. For years I baked bread and kneaded it by hand, so I now can tell just by looking at it if it'll turn out right.
You want the dough to be sticky to the touch, but easily pull off the sides of your bowl.

Step 5:
Butter a large bowl, and put the dough inside to rise for an hour.
If you have a sunny windowsill, cover the dough and place it there so the warmth will help activate the yeast. Another option is to put it in the oven with the light on.

Step 6:
Punch down the dough, and transfer to your buttered loaf pan. Let it rise for 30 minutes.
Pre-heat the oven at 375*F.
"Score" with 3 cuts across the top, and bake until golden brown, about 45 minutes.
This time that I baked it, it was almost done around 30 minutes, so I tented it with foil to make sure the outside stayed the same, but the inside baked more.

Butternut Squash Crockpot Soup & Easy, Homemade Bread - TheCraftyMann.Blogspot.Ca

Time to start the soup! Check out the original post on Gimme Some Oven.

Soup ingredients:
2 cups vegetable stock
2 cloves garlic, peeled and minced
1 carrot, peeled and diced
1 Granny Smith apple, peeled, cored, and diced
1 medium-sized butternut squash, peeled, de-seeded, and diced
1/2 teaspoon salt
1/2 teaspoon black pepper
1/8 teaspoon cayenne
1/2 teaspoon cinnamon
The original recipe also uses 1 diced white onion (I hadn't realized we had run out!), fresh sage, and coconut milk

Step 1:
Peel, de-seed, and dice the butternut squash. Prep the rest of the fruits and vegetables.


Butternut Squash Crockpot Soup & Easy, Homemade Bread - TheCraftyMann.Blogspot.Ca

Step 2:
Add everything into the crockpot and stir. Cook the soup on low for 6-8 hours, or 3-4 hours on high.

Step 3:
Once the soup is cooked and the ingredients are softened, blend them up. If you're using an immersion blender, make sure the sides of the container are much taller than the height of the soup! We're lucky enough to own a Blendtec, which can blend up the hot soup all in one go.

Butternut Squash Crockpot Soup & Easy, Homemade Bread - TheCraftyMann.Blogspot.Ca

Fresh bread and delicious soup is always a good decision on a cold day! You can add coconut milk, regular milk, or sour cream to the soup when eating it to get a little more creaminess. 

Butternut Squash Crockpot Soup & Easy, Homemade Bread - TheCraftyMann.Blogspot.Ca

I already miss that bread!

Sunday, January 10, 2016

Vegan Chocolate Raspberry Naked Cake - Birthday Cake #2!

Vegan Chocolate Raspberry Naked Cake - Birthday Cake #2! - TheCraftyMann.Blogspot.com
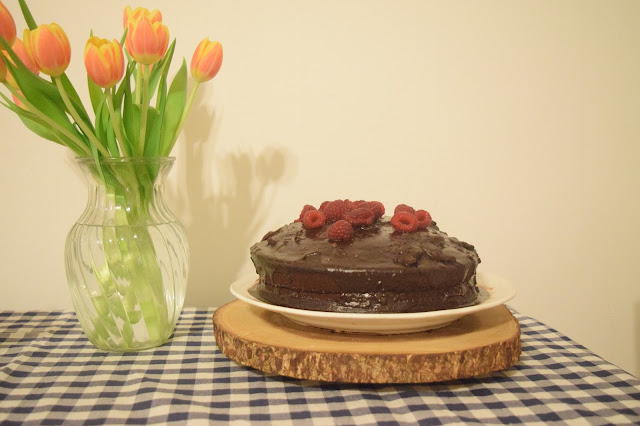
My birthday tulips and the cake
The day of my birthday (January 9th) I had some friends from work over to celebrate. Of course, I needed to bake another cake. I really wanted to make a "naked cake," but for a small party two layers would suffice. (I'm still scared to split cakes.) The cake is "naked" because there is no icing on the side, which makes it super easy to decorate. Often they have much thicker icing layers involving lemon curd or buttercream so that it's easier to see.
I worked off of Martha Stewart's "Lighter Chocolate Cake" from her cakes book, which is a single layer chocolate cake.

  1. I doubled Martha's recipe to make two 9" rounds.
  2. If one of the cakes has an uglier top, put that one upside-down on your plate. 
  3. Spread raspberry jam and let it set.
  4. Spread chocolate sauce/icing on top of the raspberry jam.
  5. Gently set the nicer-topped cake right-side up on the first layer.
  6. Put icing on top of the cake, and garnish with raspberries. 
The issue that came up for me was that my chocolate glaze between layers one and two was perfect, but on the top the first batch was too chunky (and not enough of it!) and the second was too thin. There were some bumps on the cake because of that, but it still tasted amazing.
I've added it to MyFitnessPal so you can see the nutrition information. 

Ingredients:
2 cups warm water
1 cup unsweetened cocoa powder
3 cups all-purpose flour
2 cups granulated sugar
1 1/2 teaspoon baking soda
1 teaspoon salt
1 cup canola, vegetable, or safflower oil
2 tablespoons vanilla extract
4 teaspoons distilled white vinegar (vinegar takes the place of eggs to make the cake rise)
vegetable oil cooking spray

For the glaze:
2 cups semi-sweet chocolate chips
2 tablespoons water
powdered sugar if necessary
  1. Pre-heat the oven to 375*F. Coat your 8" (I used 9" rounds, so I was able to take them out 5 minutes sooner) round pans with cooking spray.
  2. Whisk water and cocoa powder in a bowl.
  3. Mix flour, sugar, baking soda, and salt in a large bowl. Add cocoa mixture, oil, and vanilla. Once smooth, add vinegar.
  4. Pour evenly into the cake pans. Bake until your cake-tester comes out clean, 25-35 minutes (9" round) or 30-40 minutes (8" round). 
  5. Rest cakes in pans for 20 minutes on wire rack. Once cooled, use a knife to loosen cakes, and gently place on the racks to cool completely.
  6. Melt the chocolate chips in a bowl with the water until smooth. If the glaze is too thin for your tastes, add in some powdered sugar. 
Enjoy!